How to Remove the Hard Top on a Ford Bronco
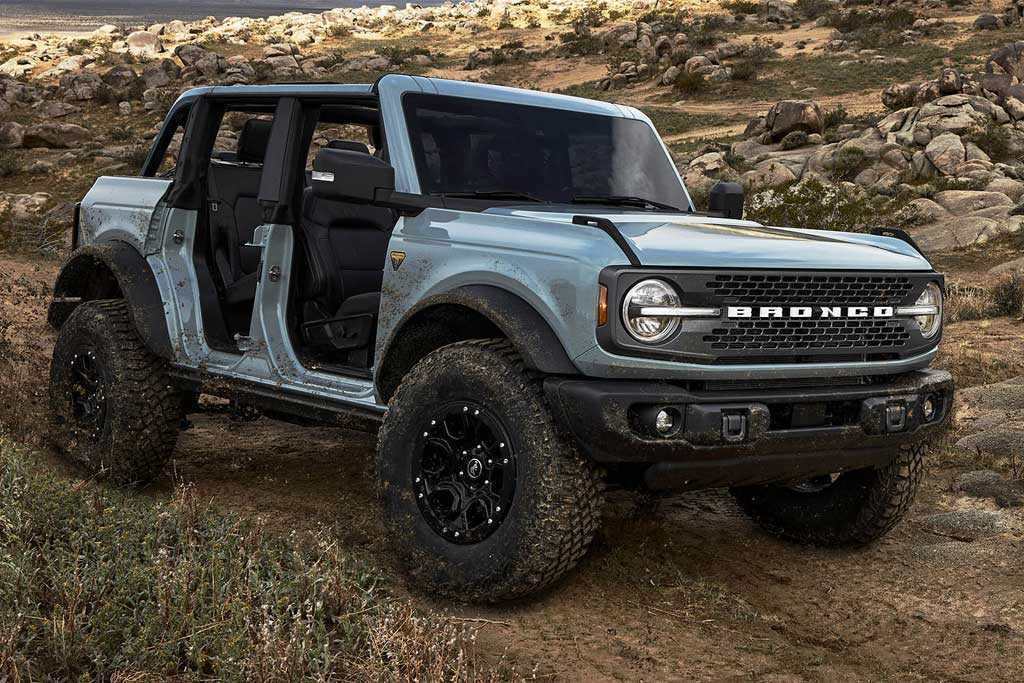
The Ford Bronco is a classic American SUV with a rich history that dates back to its debut in 1966. Throughout the years, one of the Ford Bronco's most iconic features has been its removable hardtop which allows for customizations and a unique open-air driving experience. As a proud Bronco owner, understanding how to safely and efficiently remove the hardtop can greatly contribute to your enjoyment of this remarkable vehicle.
Being proficient in removing the Bronco's hardtop not only allows you to take advantage of warm, sunny days but also facilitates maintenance tasks and opens up a world of personalization possibilities. With the proper knowledge and techniques, detaching the hardtop can be a straightforward and manageable process that significantly enhances your overall experience with the vehicle.
In this article, we will guide you step by step on how to remove the hardtop on your Ford Bronco, ensuring a secure and accessible approach. By mastering this skill, you can confidently embrace the versatility of your Ford Bronco and enjoy all it has to offer.
Understanding Your Ford Bronco Hard Top
Before diving into the removal process, it's essential to familiarize yourself with the different components of your Ford Bronco hard top. There are various hardtop types across different Bronco models, and understanding their unique features will make the removal process smoother.
Firstly, Ford Bronco 2-Door models come with a removable hard top which requires additional steps for removal due to their roof rails. On the other hand, Ford Bronco 4-Door models have a hard top divided into three sections: the front pair of panels (driver and passenger side), center panel, and rear panel. Both the front and center panels can be removed quickly, providing an open-air experience.
Before proceeding with the removal, ensure that you're taking the necessary safety precautions. Here are a few crucial steps to consider:
- Park the vehicle on a level surface, turning off the engine.
- Engage the parking brake for added safety.
- Keep the transmission in Park (for automatic) or Neutral (for manual).
- Only remove the hard top under favorable weather conditions, ensuring there's no unfavorable weather forecast.
Safety is paramount; hence it's essential to maintain awareness and vigilance. By familiarizing yourself with the components of your Ford Bronco hard top and adhering to proper safety measures, you're now ready for a successful removal process.
Preparing for Removal
Before you begin the process of removing the hardtop on your Ford Bronco, it's crucial to properly prepare your workspace and gather the necessary tools and equipment. This will not only ensure a smooth removal process but also help maintain the integrity of your vehicle's components.
First, gather the essential tools required for the job. This may include:
- Ratchet
- Socket set
- Torx bits (T50 or other sizes as specified in your owner's manual)
- Screwdrivers (Phillips and flat-head)
It's recommended to dedicate a spacious, clean, and well-lit area for the task. This will provide sufficient room to maneuver and prevent any damage to the hardtop.
- Tip: A padded or non-abrasive surface, such as a soft mat or blanket, is ideal for placing the disassembled components.
Next, ensure that you have a clear understanding of your Ford Bronco's specific model and hardtop features. It's always a good idea to consult your owner's manual for tailored guidance, as it may contain model-specific instructions or precautions.
Depending on the size and weight of your Bronco's hardtop, you might want to enlist the help of another person. This will make lifting and maneuvering the hardtop parts easier and safer.
Once you have properly prepared your workspace and gathered the necessary tools, equipment, and assistance, you're ready to begin the process of removing your Ford Bronco's hardtop. Stay safe and proceed with confidence!
Removing Your Ford Bronco Hard Top
Before beginning the hardtop removal process, make sure your Ford Bronco is parked on a level surface, and engage the parking brake to prevent movement. Ensure that you have a suitable place to store the hardtop once it's removed to prevent scratches or damage.
-
Opening doors and windows: Begin by opening all doors and sliding windows to give yourself ample access to the latches and bolts holding the hardtop in place. Optionally, you can also lower the vehicle's rear glass for better visibility.
-
Locating latches and bolts: Inside the Bronco, locate the outboard over-center latch and the three other quarter-turn latches. These latches secure the "T-top"-style panel to the vehicle. Additionally, identify the bolts attaching the rear portion of the hardtop (if equipped) on the sides and back of the Bronco.
-
Disconnecting electrical connections (if applicable): If your Ford Bronco has electrical connections for a rear wiper or defrost, unplug these connections before proceeding. Locate the connection points, typically found near the rear portion of the hardtop, and disconnect them.
-
Removing T-top panel: Sit in the driver's seat, release the outboard over-center latch, and then release the three other quarter-turn latches holding the T-top panel. Carefully lift the lightweight panel, weighing around 12 pounds, and set it aside in a safe and secure location.
-
Removing rear portion of the hardtop: With the T-top panel removed, proceed to loosen and remove the bolts holding the rear portion of the hardtop in place. There may be multiple bolts, so ensure you've removed all necessary fasteners before attempting to lift the hardtop.
-
Lifting and storing the hardtop: Once all latches and bolts are released, and the electrical connections are disconnected, carefully lift the hardtop from the vehicle with the help of at least one other person. Be aware of the hardtop's weight and dimensions, and lift from both sides for even weight distribution. Place the hardtop on a flat surface or a custom hardtop storage cart, protecting it from scratches or damage.
By following these steps, you should be able to confidently and safely remove your Ford Bronco's hardtop. Remember to store the removed hardtop in a secure location to avoid any potential damage.
Tips for Safe Handling
When removing the hard top on your Ford Bronco, safety should always be a priority. Consider the following tips to ensure both your safety and the proper care of your hardtop:
-
Plan ahead: Before you begin, make sure you have a clean, flat, and sturdy surface to place the hardtop onto after removal. This will prevent any potential damage or scratches.
-
Proper lifting techniques: It is vital to use correct lifting techniques to avoid injury. When lifting the hardtop, bend your knees and keep your back straight to prevent strain. Make sure to grip the hardtop securely with both hands, lifting with your legs rather than your back.
-
Teamwork: The hardtop can be heavy and cumbersome for one person to manage. If possible, enlist the help of a friend or family member to assist with the lifting and placement of the hardtop during removal.
-
Careful storage: After removing the hardtop, store it in an area out of direct sunlight and away from any hazards. If you have a storage bag or case, make sure to place the hardtop inside correctly, according to the manufacturer's instructions.
-
Inspect for damage: Before reinstallation, inspect the hardtop for any signs of damage or wear. Address any issues as needed to ensure a proper fit and function of your hardtop.
By adhering to these tips, you can safely remove, handle, and reinstall your Ford Bronco's hardtop while preserving its integrity and your own well-being.
Reinstallation of the Ford Bronco Hard Top
After successfully removing the Ford Bronco hardtop, you will need to reinstall it at some point. To ensure a secure and stable reinstallation, follow these step-by-step instructions:
-
Position the hardtop: With the help of a friend or using a hoist system, carefully lift the hardtop and position it over your Bronco. Make sure it's correctly aligned with the vehicle's body and mounting points.
-
Align mounting holes: Double-check the alignment of the hardtop with the mounting holes in the vehicle. It's essential to get this right to ensure a tight and secure fit. Be patient and adjust the hardtop as needed until all mounting holes line up perfectly.
-
Secure bolts: Once the hardtop is correctly aligned, it's time to secure it. Start by hand-tightening the bolts to keep the hardtop in place. Then, using a torque wrench, tighten the bolts according to the manufacturer's specifications. Do not overtighten, as this can cause damage to the hardtop or the vehicle.
You can typically find the following bolt locations:
- Front panel: Two bolts per side
- Center panel: Four L-brackets (two per side)
- Rear section: Multiple bolts on the rear edges, corners, and body mounts
-
Reconnect electrical connections: If your Ford Bronco has electrical components integrated into the hardtop, such as lights, soundbars, or power outlets, you'll need to reconnect these connections. Carefully plug in all the necessary wiring harnesses and make sure the connections are secure.
Remember, thoroughness and precision are crucial in ensuring a safe and secure installation. By following these steps, you'll successfully reinstall your Ford Bronco hardtop and enjoy the comfort and protection it provides.
Maintenance and Care Tips
Proper maintenance and care for your Ford Bronco hardtop ensure that it remains in top condition, providing you with the utmost safety and enjoyment. By following a few essential guidelines, you can preserve the longevity and performance of your hardtop.
Regular Inspections: Make it a habit to inspect the hardtop for any signs of wear, tear, or damage. Pay close attention to the seals, bolts, and latches. If you notice anything out of the ordinary, such as cracks or loose parts, address the issue promptly to prevent further damage.
Cleaning Techniques: Keep your hardtop clean by using mild soap and water. Avoid using abrasive materials or chemicals, as they can cause damage to the hardtop's surface. Gently scrub the surface with a soft sponge or cloth, being extra careful around the seals and latches.
-
Do:
- Use mild soap and water
- Gently scrub with a soft sponge or cloth
-
Don't:
- Use abrasive materials or chemicals
- Scrub forcefully
Proper Storage: When you're not using the hardtop, store it in a safe and dry location. Make sure the storage space is free of dust, moisture, and extreme temperature fluctuations. Using the provided storage bag will help protect your hardtop from exposure to harmful elements.
Follow these tips and you'll be well-equipped to maintain the appearance and functionality of your Ford Bronco hardtop, ensuring a great experience every time you set out on an adventure.
Conclusion
By now, you should have a solid understanding of how to remove and reinstall the hardtop on your Ford Bronco. This skill is crucial for both practical and recreational aspects of owning a Bronco, allowing you to fully enjoy the vehicle's versatility. The key insights from our guide can be summarized in the following steps:
- Preparation: First and foremost, gather all necessary tools and ensure the vehicle is on a stable, level surface.
- Latches release: Locate and release the various latches securing the hardtop, including the outboard over-center latch and the quarter-turn latches.
- Lift the panels: Carefully lift the T-top type panel and other sections of the hardtop while adhering to proper lifting techniques to avoid injury.
- Reinstalling: When you're ready to reinstall, follow the removal steps in reverse, ensuring all latches are correctly secured.
As a confident and knowledgeable Bronco owner, you should now be able to handle the hardtop removal process with ease. This guide ensures a clear, step-by-step procedure to help you become proficient in this necessary skill.
We encourage you to engage with the Bronco community by sharing your experiences or asking questions about hardtop removal. Your feedback and ongoing dialogue are invaluable in helping others on their Bronco journey. Enjoy the open road with your newfound knowledge!
- Choosing a selection results in a full page refresh.

